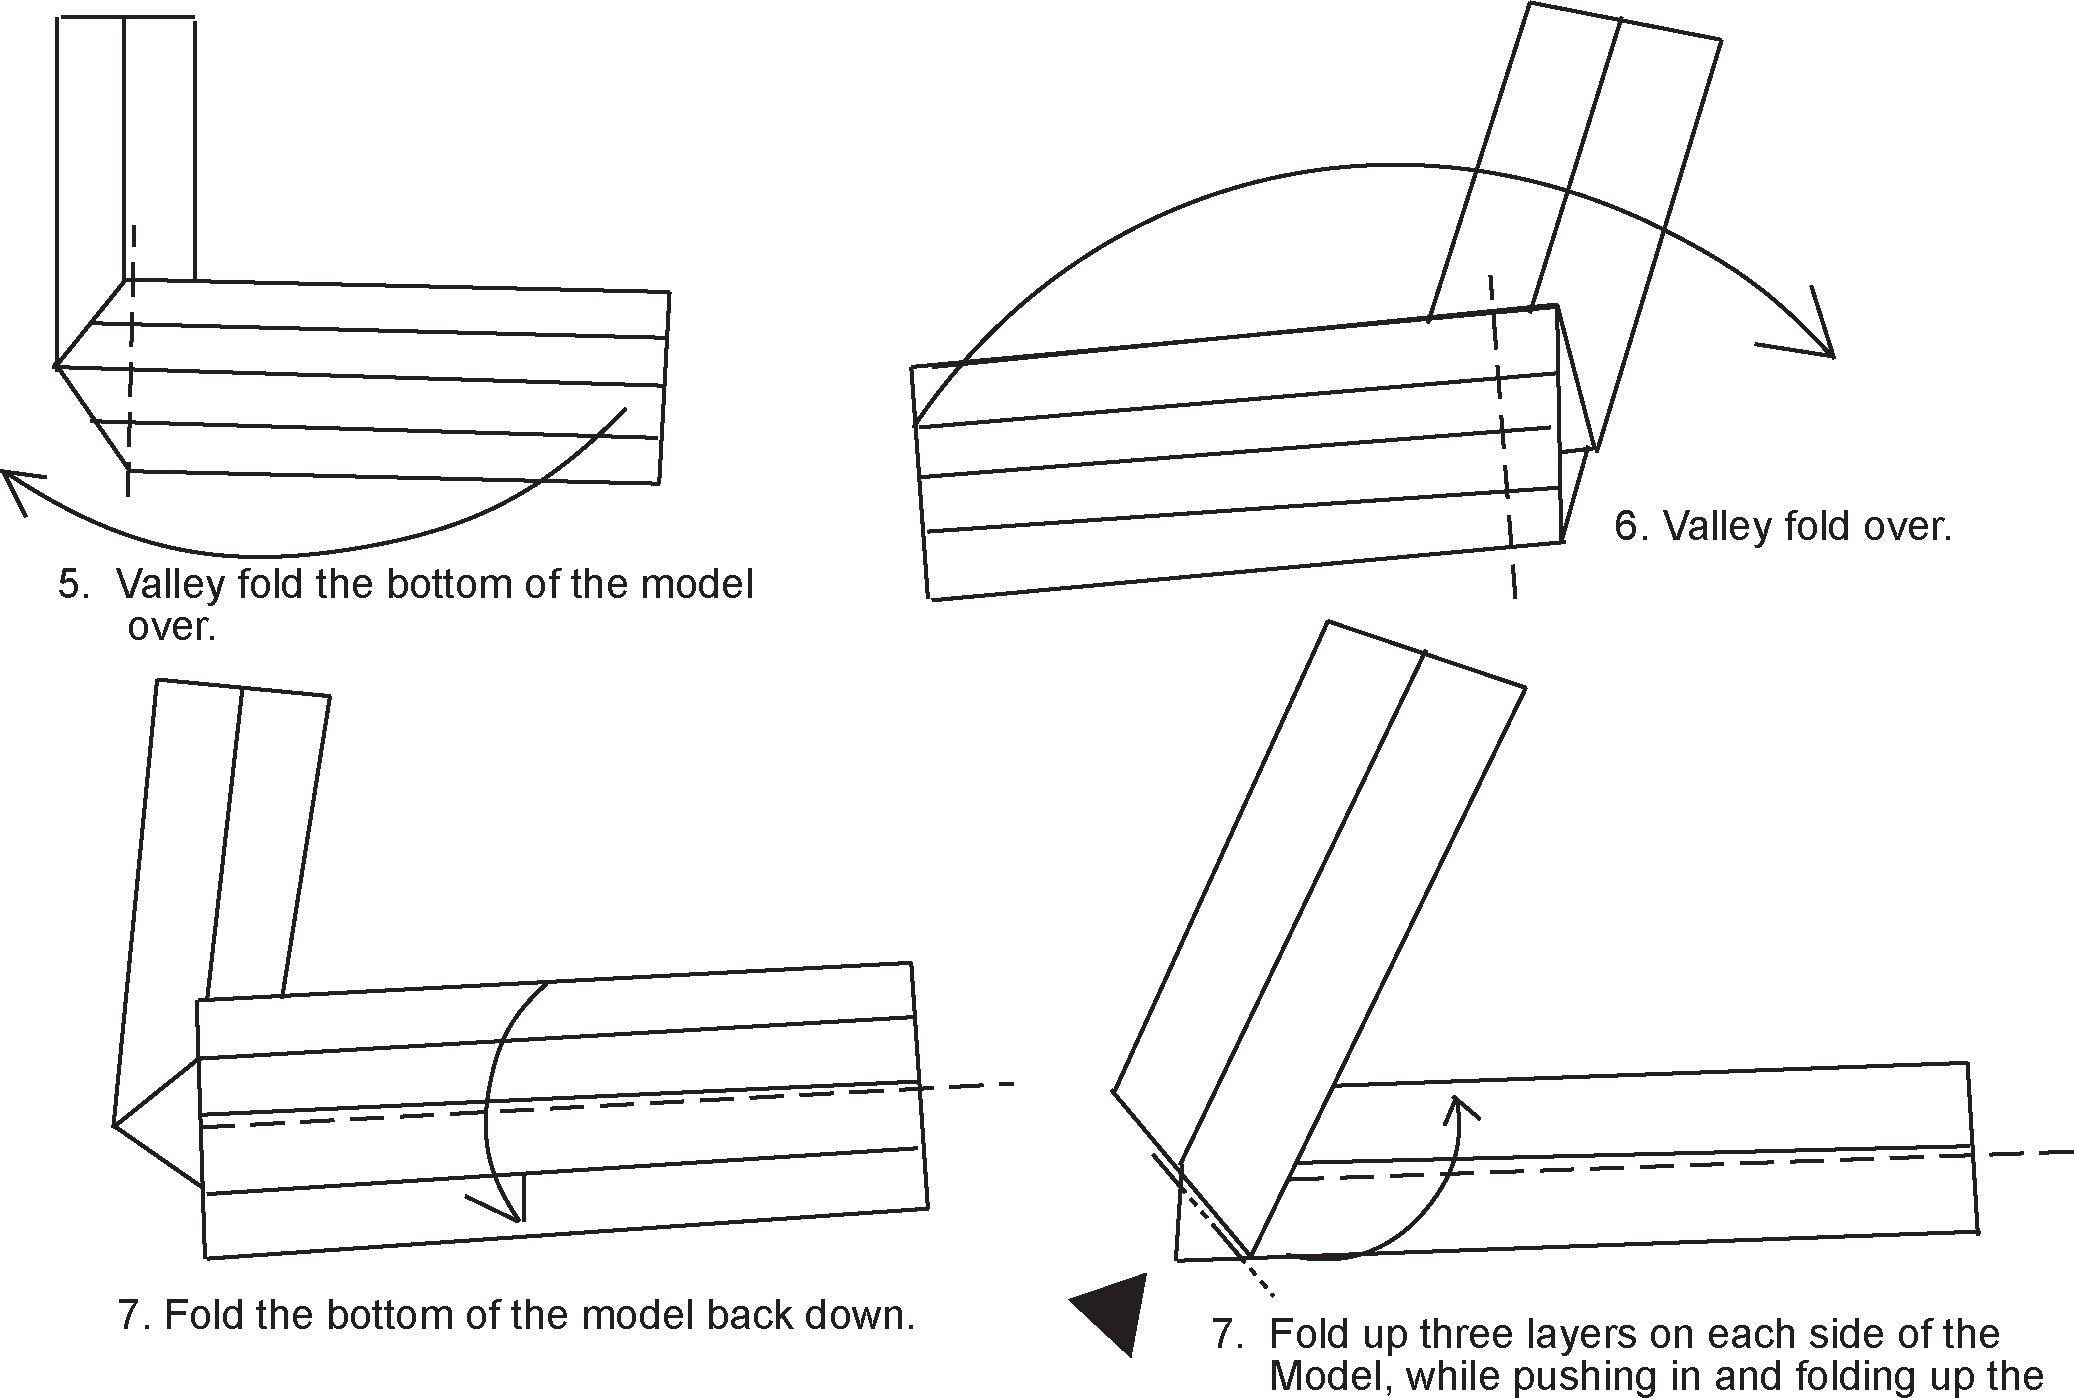
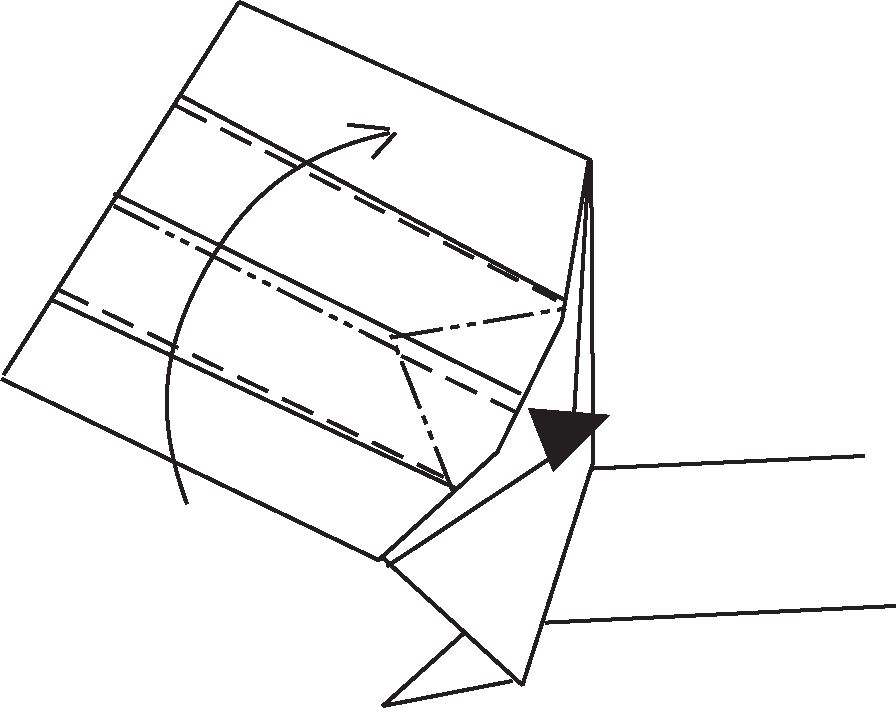
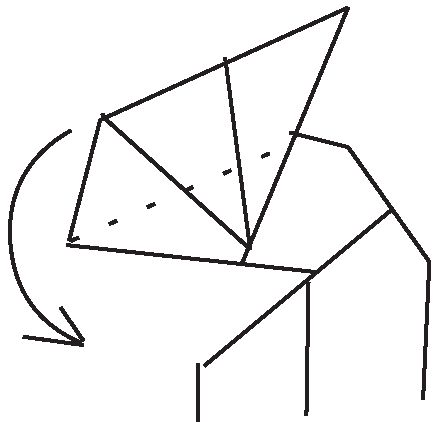
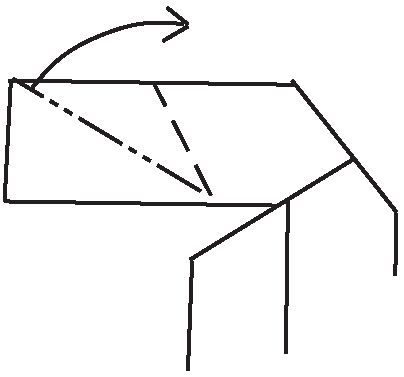
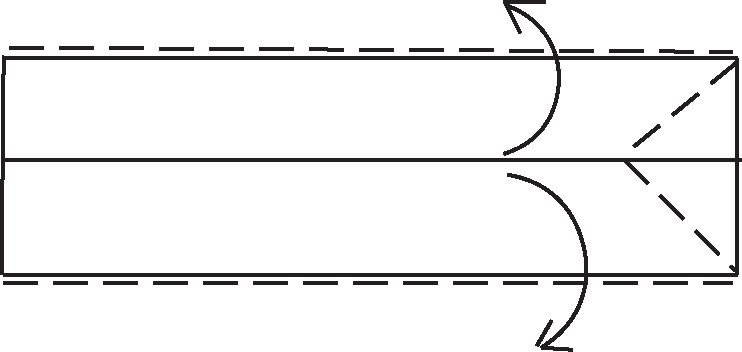
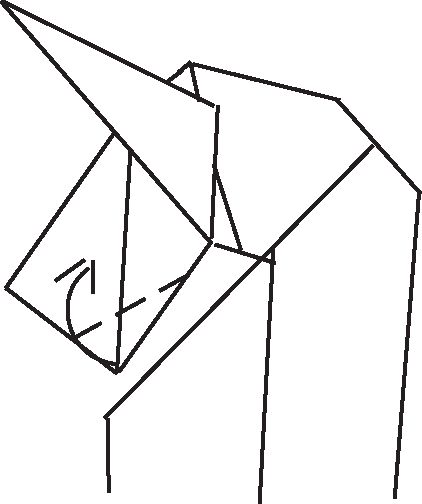
3. Pull out three layers on each side of the model.
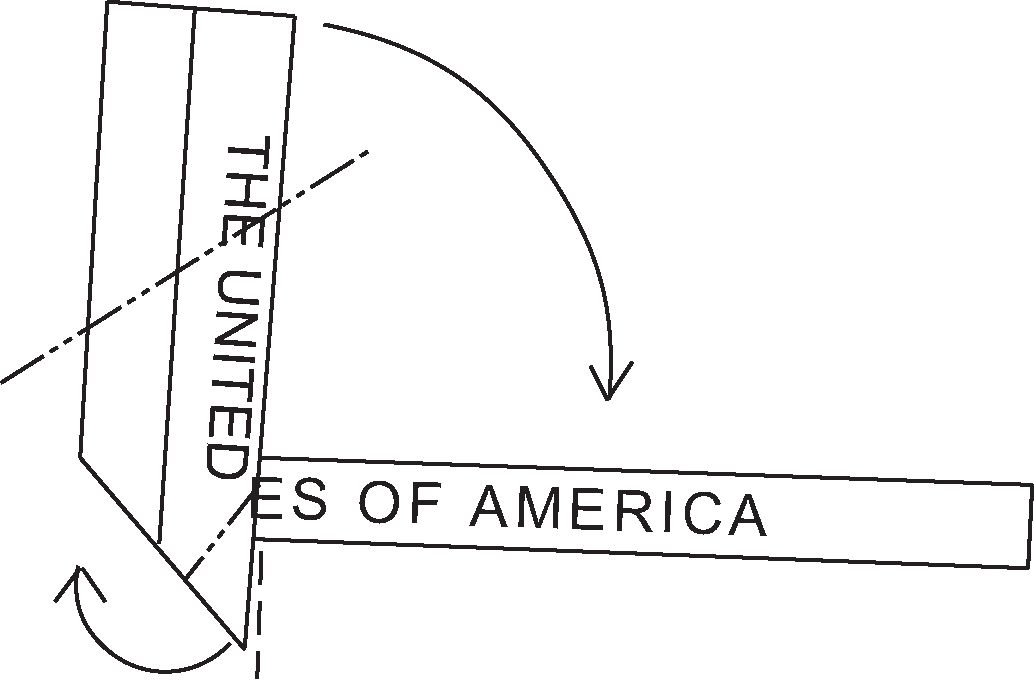
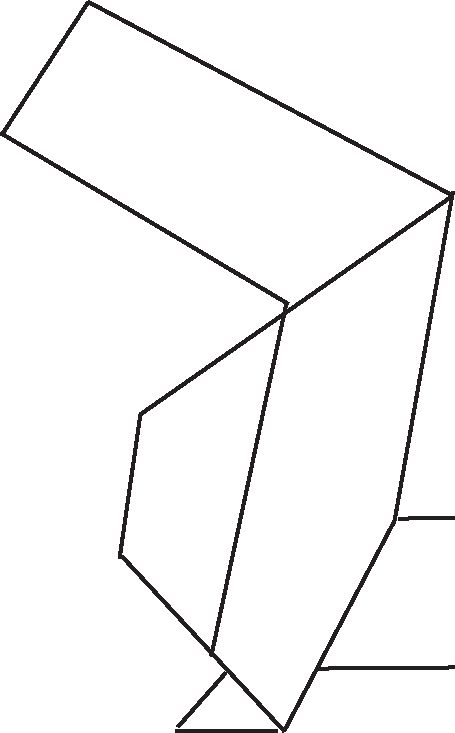
4. Open up the bottom of the model.
Online collections
monedastodas.com
All collections » Origami » $Fan Tailed Dragon
By Perry BaileyCopyright Decmber 1999
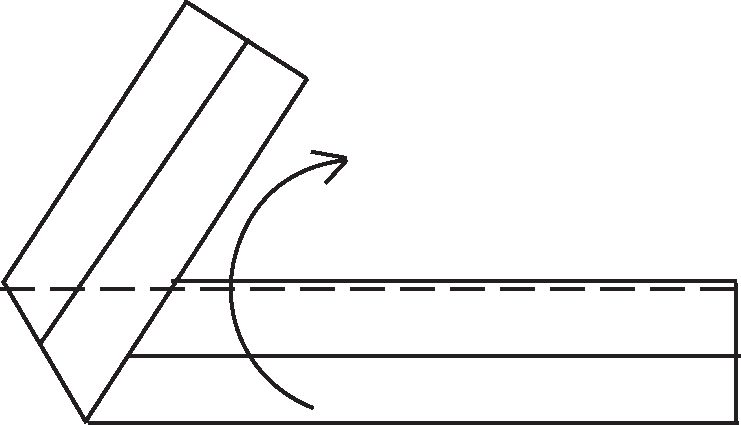
3. Pull out three layers on each side of the model.
4. Open up the bottom of the model.
bottom corner.
9. Reverse fold the flap back to the front.
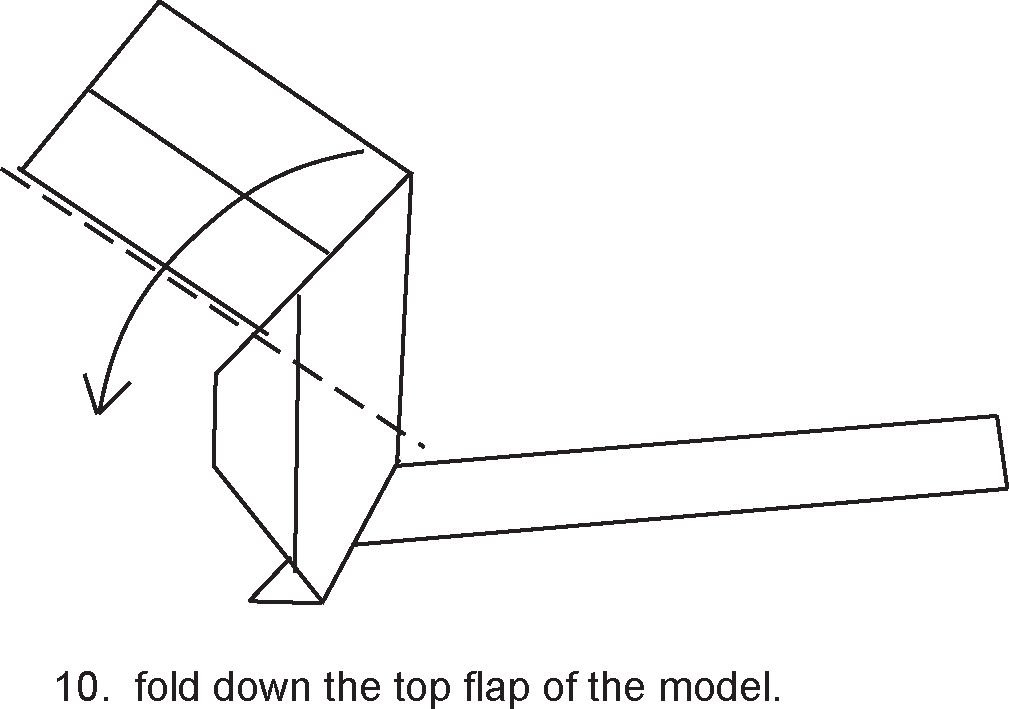
8. Reverse fold the entire top down till it touches the main body. Then use another reverse fold to make the feet (repeat on other foot).
11. Bring up the middle layer by collapsing the center of the model upwards while refolding the top back together, you will have to sink the back of the top flap into it’s self into the model.
12. The results should be like this in shape.
19. Rabbit ear the flap into it’s self to finish the horns Curl to taste.
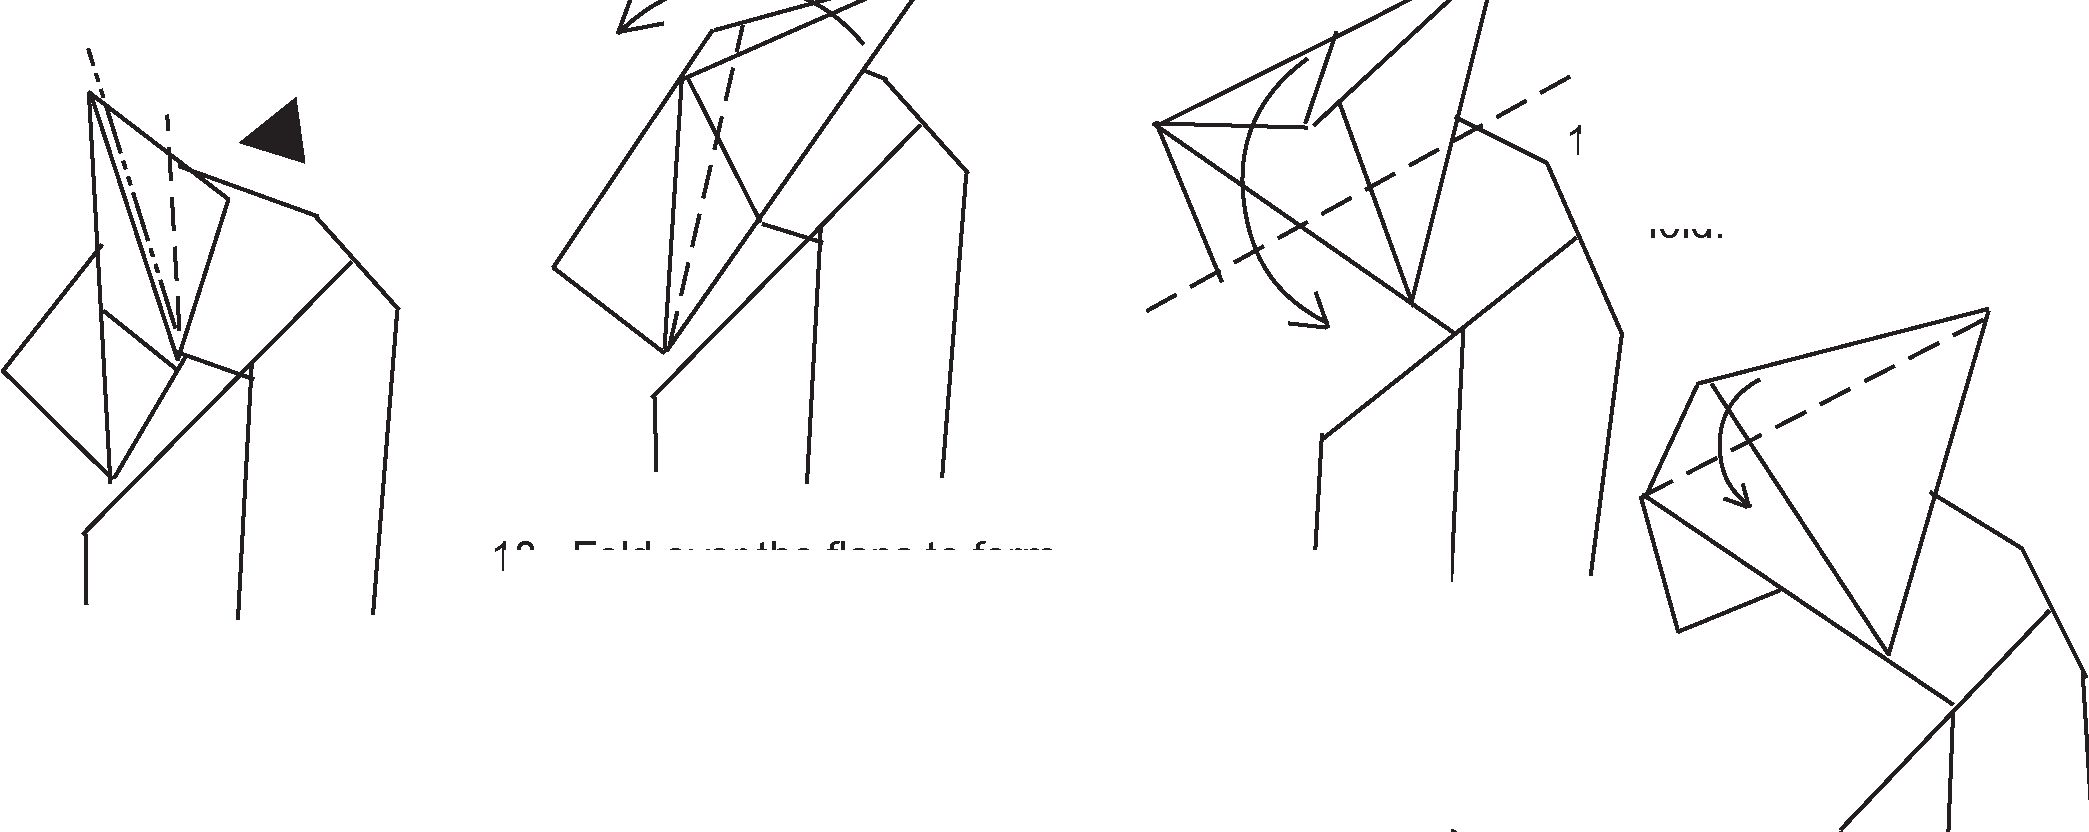
18. Fold over the flaps to form the horns.
17 Fold down bothsides evenly this will involve a partial reverse fold.
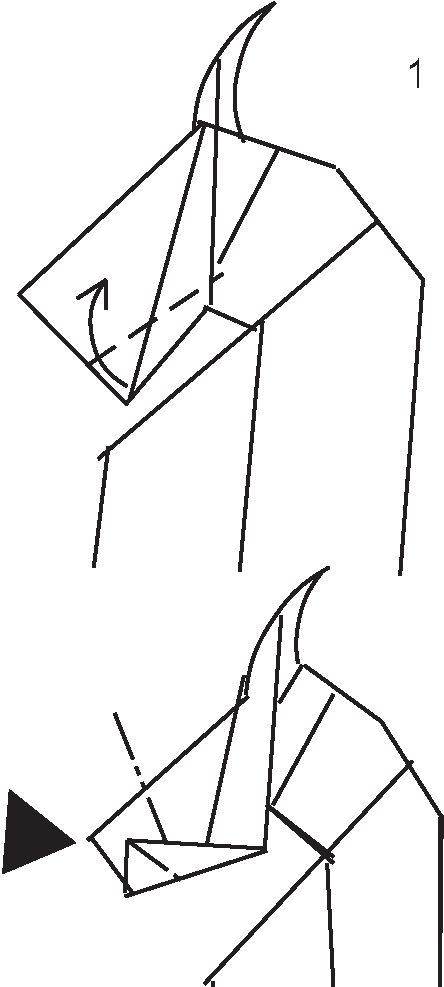
20. Fold up the tips to make the fangs.
16
Fold down top layer each side.
21. Sink the excess paper to finish the head.
14 Fold up 2 layers so that the outside layer comes to a point.
15 Pull down inner layer.
13 Fold in a little at the back of the neck.
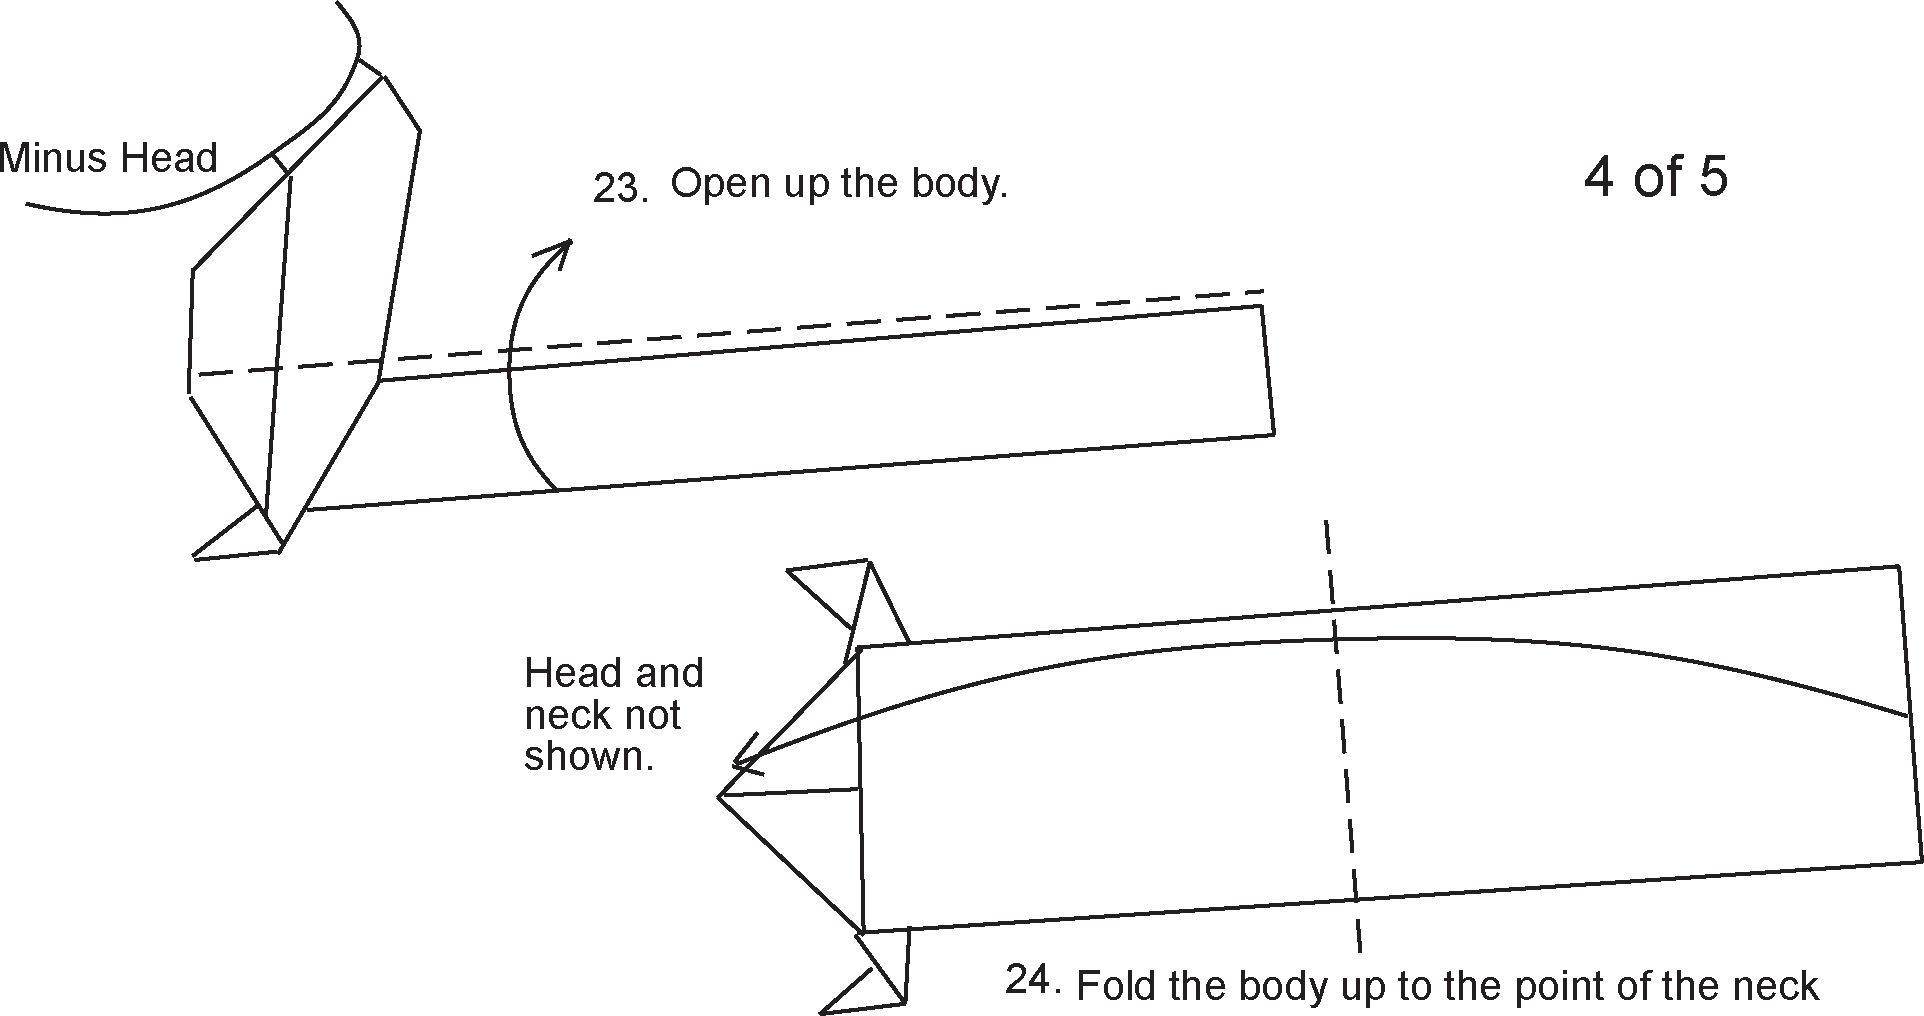
22. Now we can start on the end of the beast!

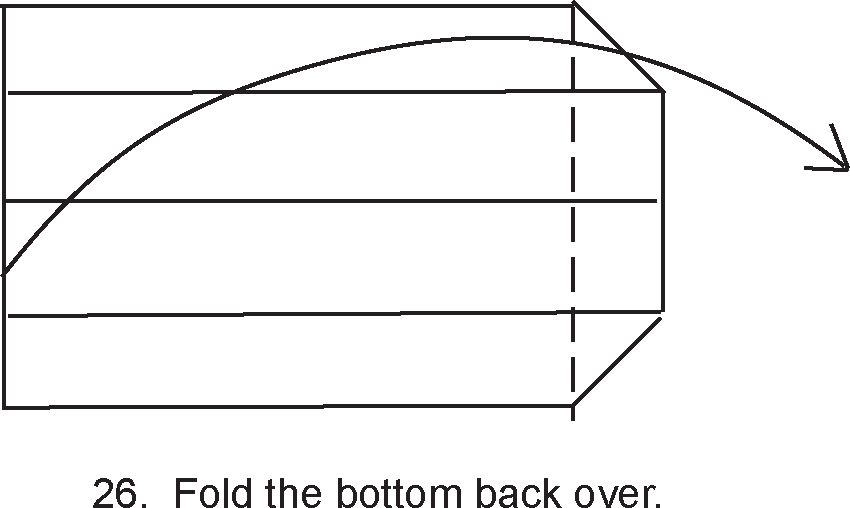
25. Partialy unfold the bottom and wrap one layer of paper over on each side.
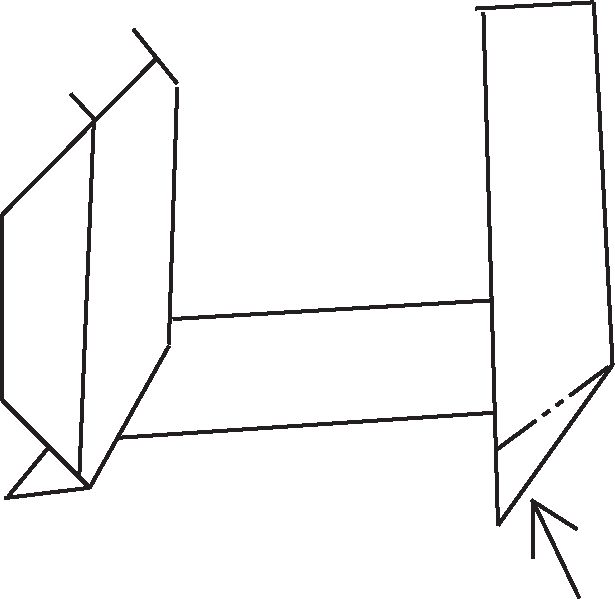
28. Reverse fold up to form the back feet.
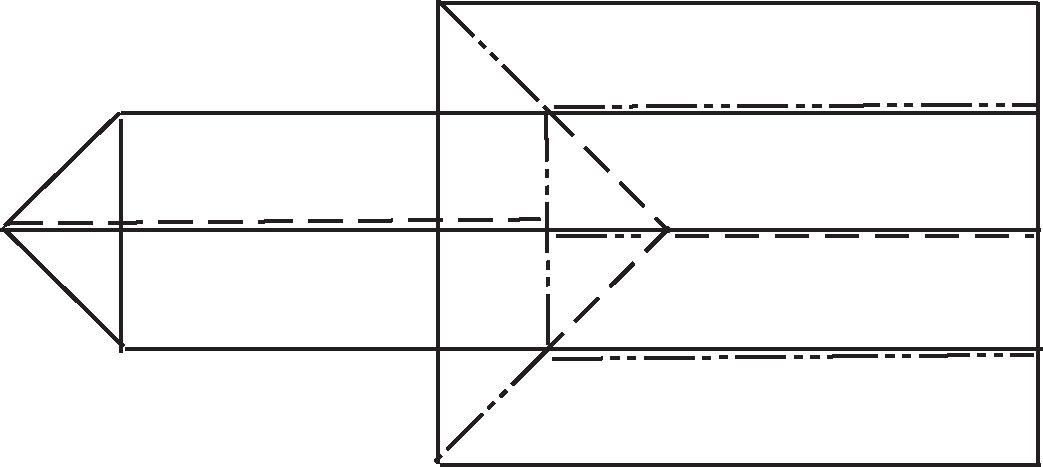
27. Colapse into shape.
29. Just the feat.
other side.
18. Fold down top section on both sides.

20. Fold up to form jaw then go to step 21.
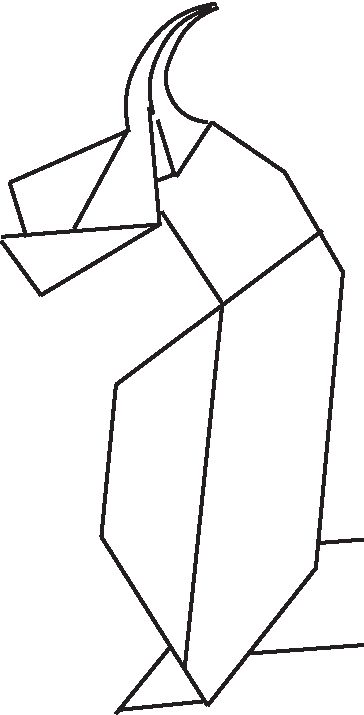
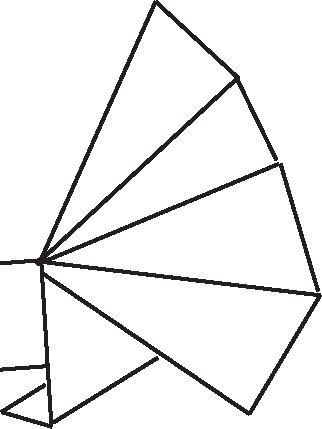
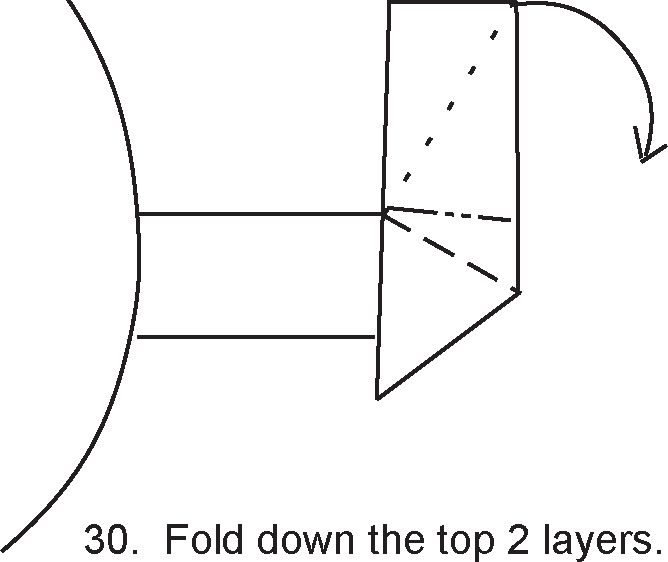
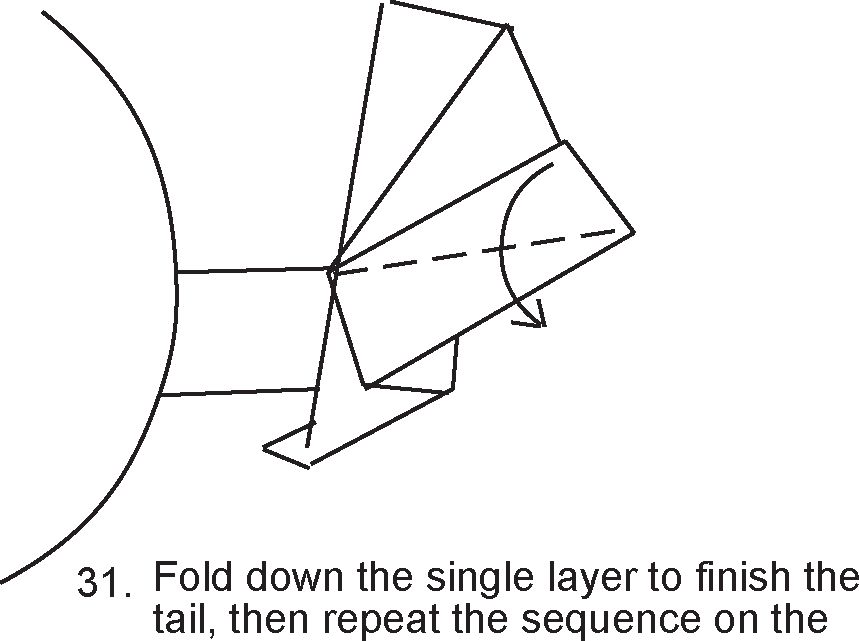
32. Finished! now you can fan the tail out a bit and even puff out the chest a little if you like and put a final curve to the horns!
Download PDF file with this instructions for printing